There already many AVI to DVD guides around but this one is by far the most complete and easy one. It wil explain in detail what you need to do to create a DVD with AC3 sound and subtitles from a DivX/XviD file with AC3. You will find VirtualDubMod, AC3Filter and VobSub in our downloads section, as well as TMPGEnc which contains a 30 day trial of the MPEG2 encoder. Note that you can use whatever encoder and authoring tool you want, we show the preperation process and then how to use some popular tools, you can use your favourite programs, or see the other guides of the sites for some other solutions!
![]()
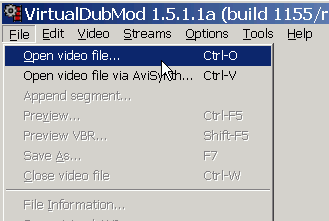 |
Install AC3Filter. Then open VirtualDubMod and load the AVI file. If your rip is a 2 CD one, read the next step about how to join them, if not then proceed to step 3. |
![]()
|
|
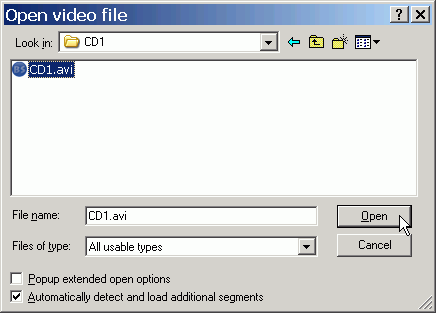
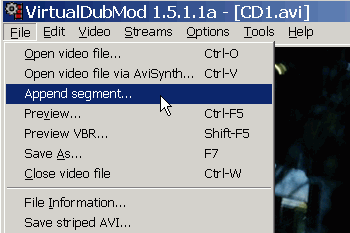
For a 2 CD rip first load the first AVI and then select File -> Append segment and open the second file as well. This will open the second file and put it straight at the end of the first one. Now you can edit the files as if it was only one of them. Just to be sure that both files are successfully loaded click the icon to go in the last frame and see if the length is correct. |

![]()
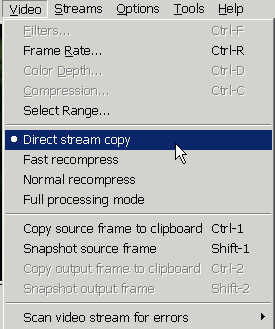 |
Now select Video -> Direct Stream Copy. |
![]()
|
|
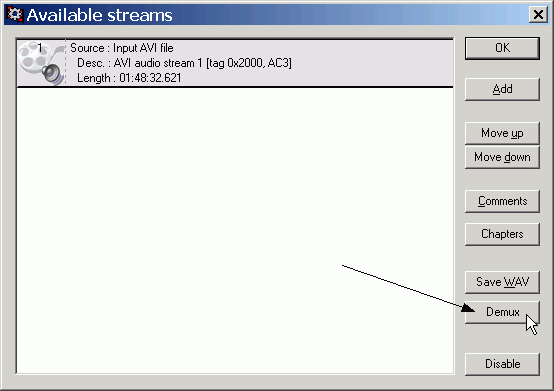
Time to extract (demux) the AC3 audio from our files. To do that go to Streams -> Stream List. You should see an AC3 audio stream. Click Demux to save it in the hard drive. |
![]()
|
|
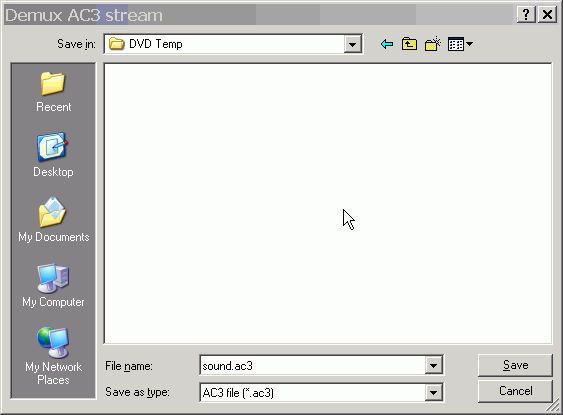
Give it a name like sound.ac3 and save it in a temp folder in your hard disk. It should not take more than 5-10 minutes. When it ends you will be back in the Stream list window. |
![]()
 |
Now click the button named Disable (it's the one that says Enable in this picture). The audio stream should go grey and get lines all over it. He are doing this as after we extracted the audio, we don't need it in the AVI file too. Now we are gonna save the AVI file with no sound. If you have only one file you may want to skip this step and use the original file, if not, the next step with merge the 2 CD files also, so you gotta do it. |
![]()
|
|
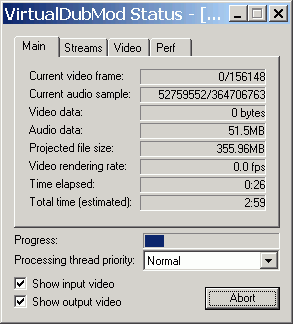
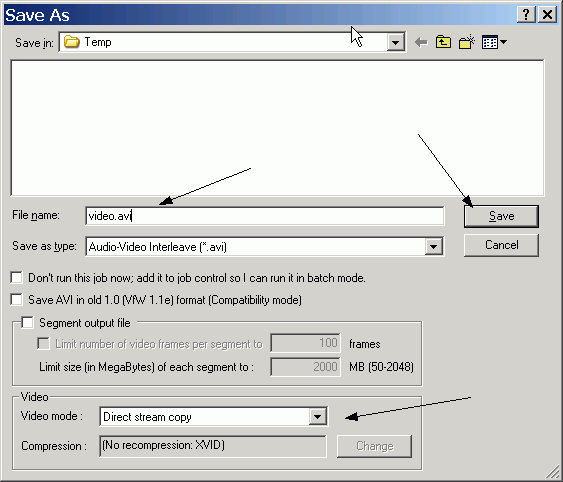
Finally you'll need to save the video file. Go to File -> Save As. Select the directory you want to save the file into, name it like video.avi and make sure that Direct Stream Copy is selected. Then click Save and wait for the proccess to finish. |

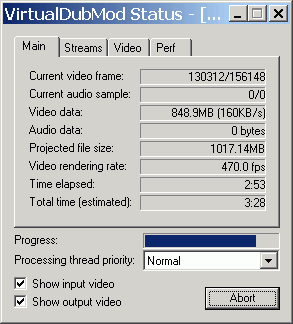 |
It should not take more than 10-15 minutes. When it ends you should have a video.avi video file and a sound.ac3 audio file. Next step will be to configure the subtitles, so if you don't want to add subtitles you can proceed to step 9, where we are going to encode the video file. |
![]()
|
|
|
|

![]()
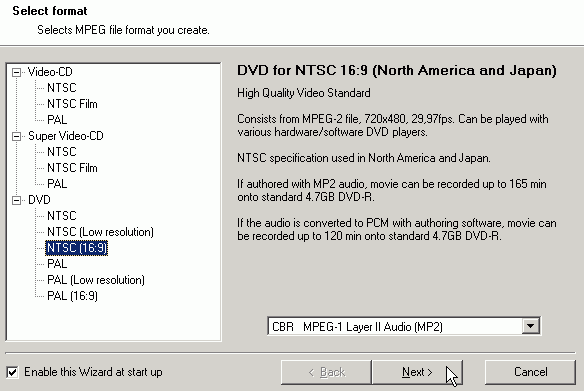 |
Here you need to select the type of the MPEG file you want to create. Select DVD of course and then it's type depending on the file you have (if it is NTSC or PAL, 16:9 or 4:3). Select whatever you want about the audio, we are not gonna use it anyway. |
![]()
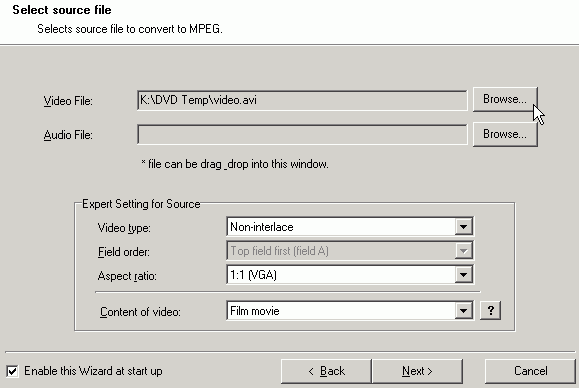 |
OK here click Browse and select the video file. In the Content of video field select video for 29,97 fps movies and Film for 23,976 ones. Note that this option appears for NTSC DVDs only. Leave the other options as is, click Next and then Next again to go to the next screen that we need to make setting to! |
![]()
|
|
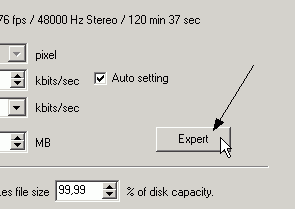
In the next screen we're gonna have a look in the Expert settings. Locate the expert button somewhere in the right top of the window and click on it. |
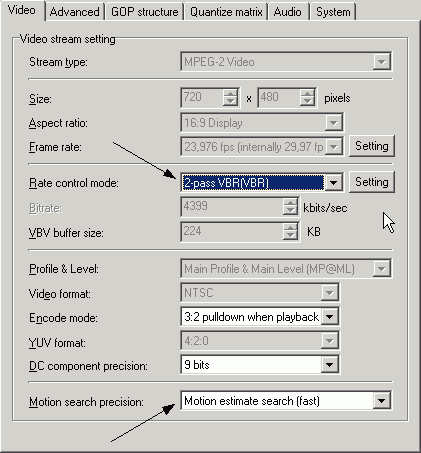 |
Now you gotta select what mode you're gonna use. CBR is faster, but VBR (2-pass) will create much better quality file. Note that it's gonna take twice the time CBR takes, so the choice is yours. Motion search precision is OK at the default Motion estimate search (fast) option. Now click Advanced tab. |
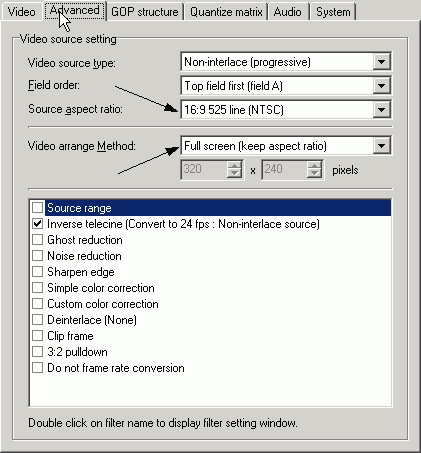 |
Here select the right source aspect ratio depending on your source file. In that case it's 16:9 NTSC. In the Video arrange method you should use Full screen (keep aspect ratio). The Inverse telecine option you see selected below, should be selected only for NTSC Film movies, and that it is enabled by default. The settings we need to make here are done, click OK to go back in the previous screen. |
![]()
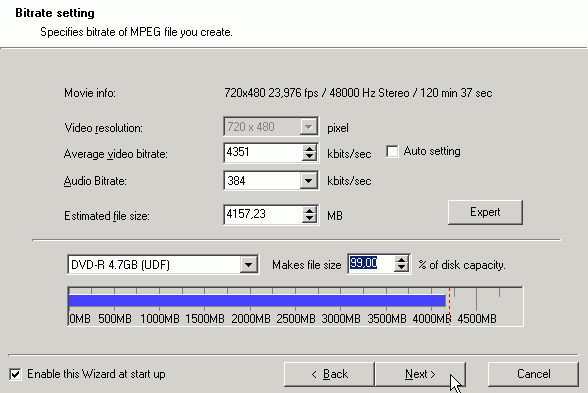 |
Here you need to set the file size to 99% of the disc. Be sure you select 384 as the audio bitrate, as we need to make sure that both the audio and the video will fit in the disc after authoring. Then click Next. |
 |
In the next screen just leave all options blank and click OK to go back in TMPGEnc's main window. |
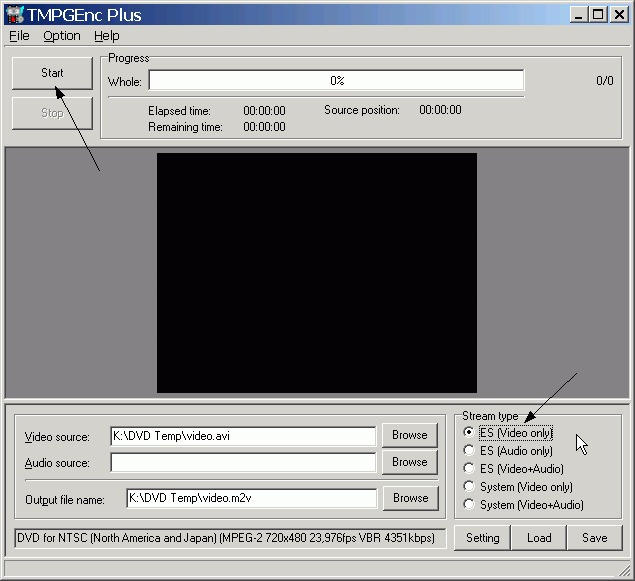 |
Finally in this window select ES (Video only) and then click Start for the encoding to begin. It's a good idea to wait and see in the preview window if the subtitles are displayed correctly. After encoding finishes you should have an m2v file with MPEG2 video plus subtitles in it and an AC3 audio file. Next comes the authoring, so load TMPGEnc DVD Author and proceed to the next step. |
![]()
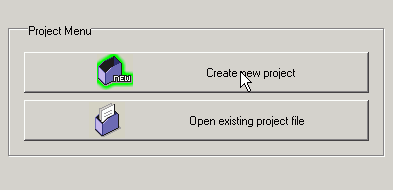 |
In the first screen of TMPGEnc DVD Author select Create new project. |
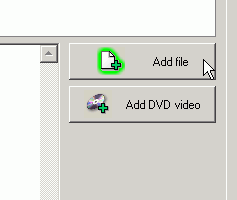 |
Select Add file in the next screen. |
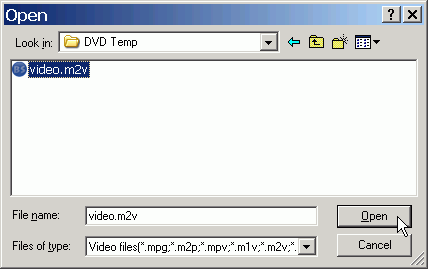 |
And open your video.m2v file. |
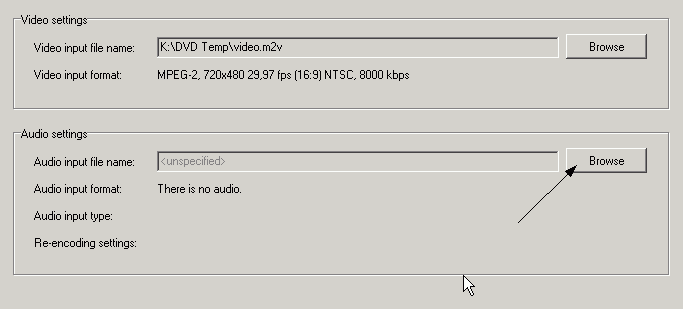 |
It should look like that after you load the video file. So click Browse and load the ac3 audio file as well. |
![]()
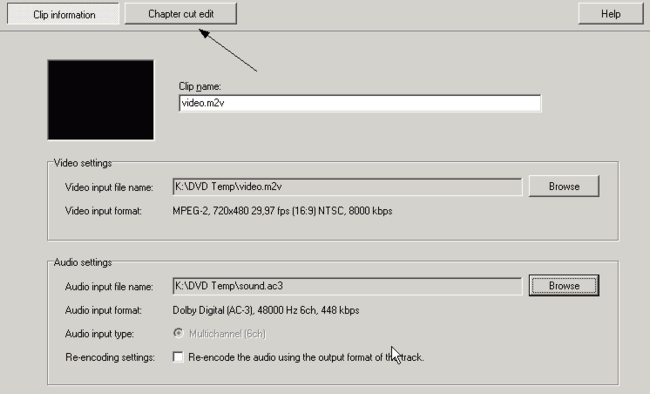 |
Everything should be like that after you load both the files. Now you can select Chapter cut edit to add some chapters. Then click OK. |
![]()
 |
|
|