This guide will help you author
a DVD using 321 Studio's tool DVD X Maker. This DVD Author program, it's great.
You can do almost everything and you can create a disc which looks exactly
as the hollywood movies you have. This is no joke!
Unfortunately 321Studios was closed, so this
software is no longer available. For those that have
a version
in their hands the guide is here!

![]()
|
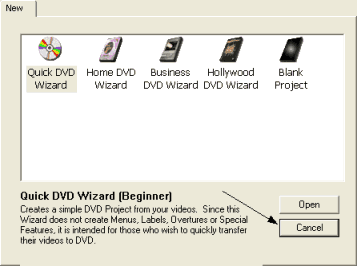
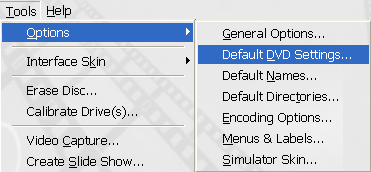
When the program starts the New DVD Project window comes up. Close it because we have to check some setttings first that we cannot change after a new project is created. Then from the menus select Tools -> Default DVD Settings |
![]()
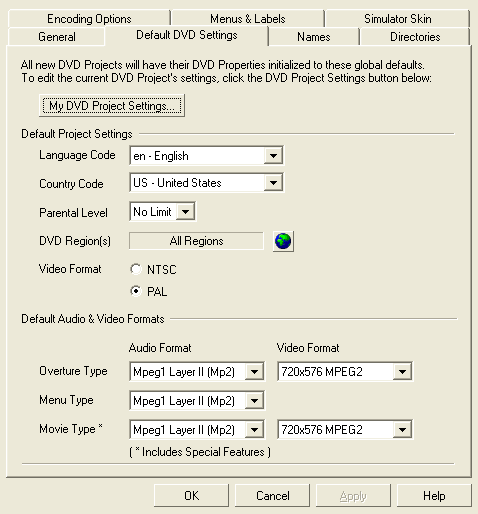 |
Here is the settings window. Change the Language code and country code as you wish and also set a Parental Level if you have to :-). I suggest you use All Regions option. At Video Format select PAL or NTSC according to the system your television uses. Usually it's PAL for Europe and NTSC for the USA. Leave the rest options as you see them here and click OK. Back to the main window. It's now time for a new project. Click the new icon in the toolbar or from the menus select File -> New Project. |
![]()
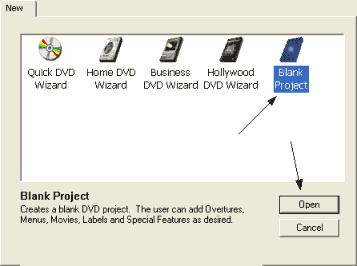 |
In this dialog select Blank Project and click Open. |
![]()
|
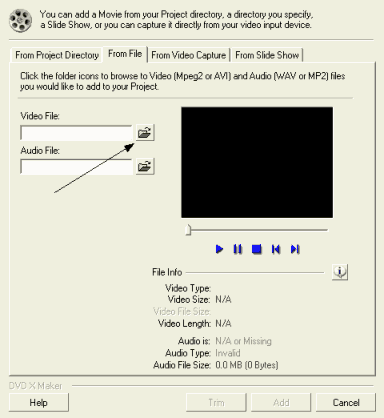
Your new project is now loaded. It's time we load a movie. From the menu go Project -> Add Movie At the new window that comes up select the From File tab. Here ew are going to select the files. The files must be MPEG1 or MPEG2 DVD video files. Click the button the arrow shows to select the video file you want and the same to select the audio file (it may be the same file, ex a mpg file that contains audio.
The program may re-encode some files, and if you have a file that contains both audio and video you will have to wait for while so that DVD X Maker joins the video with the audio. For creating a DVD video file I suggest you use TMPEGEnc Plus and read our guide here. |
![]()
|
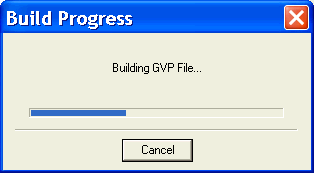
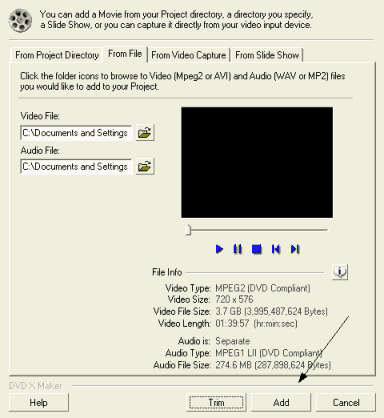
OK back to the guide. When you load the files you will probably see this screen which shoes that DVD X Maker is making a GVP file which will be used to join the audio with the video. Wait for it to finish, it should no take more than 10-15 minutes. Finally when everything is OK you should see a screen like the one on your left. Just click Add to import the movie in your project. |
![]()
|
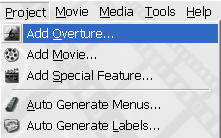
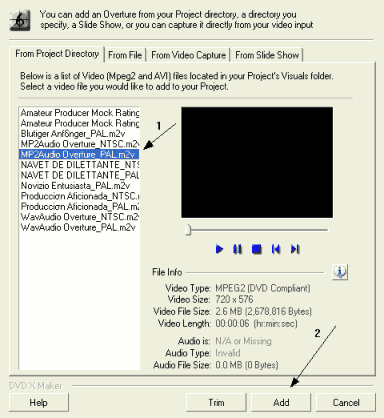
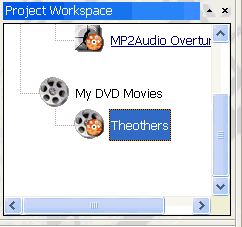
Now we are going to add an Overture to our DVD. What is overture? It is the small videos that you see when you play a commercial DVD, like the copyright warnings and the companies logo. Of course you don't have to add an overture to your DVD. We are just going to show how you can add one, in case you want to use it. So here it is: Go Project -> Add Overture from the menu. Then from the window that comes up you can select the video you want to add as an overture. You can add one video of yours using the "From File" tab. Here we are going to add a ready overture that DVD X Maker includes, so we select MP2 Audio Overture (PAL) from the list and after we click add. That's it. You can also add extra material, like video clips etc. Just go Project -> Add Special Feature (you can see it at the picture above) and add the video you want. Now you are back to the main window. Let's see how we can add some chapters to our movie. |
![]()
|
Chapters are very important because they let you move forwards and backwards in the movie quickly. Let's create some. At the Project Workspace window you can see at the left side of DVD X Maker's main window find and select your main movie. Now have a look at the toolbar that comes up below the video preview window and which part you can see here. See that button with the two plus signs? (with yellow in the picture. Click this. |
![]()
|
|
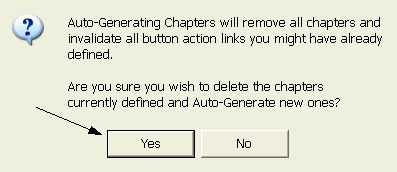
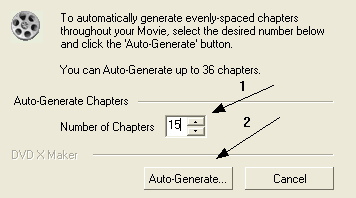
This message may come up, click Yes. In the next window we are going to decide the number of chapters that we want our movie to have. Generally use a value between 10-20, but you can use even bigger for long movie. I have selected 15 chapter. Then click Auto-Generate. If everything is OK you should see something like the picture below after the chapters are created, which means that we are ready to go at the next step which is... |
 |
![]()
|
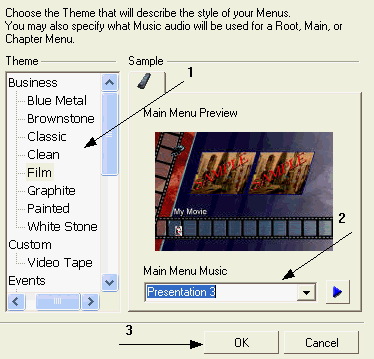
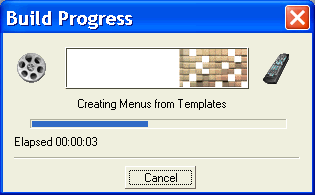
... generating some menus! Menus will let us select the chapter we want to see, or select some of the special features. Of course you don't have to create menus, so that is another optional step. In the next window what you should do is pretty simple. Just select a theme for your menu and some music in the background and click OK.
DVD X Maker generates your menus and adds them to your project! Now we can finally create the CD!
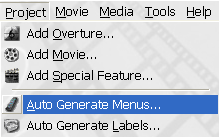
Note: As you should have noticed DVD X Maker can also create the DVD labels for you! (See the Auto Generate Labels fuction in the menu above). We are not going to show every single function of this program here, you are can find them all yourself. |
![]()
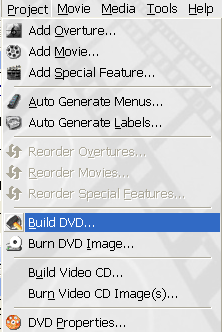 |
OK let's create our DVD. Once again we open the Project menu and we select Build DVD. |
![]()
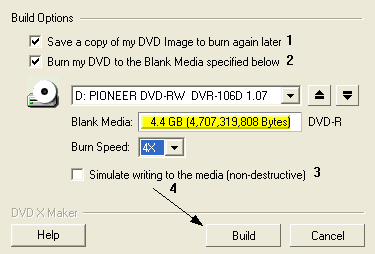 |
Let's see: we are going to select (1) if you want to keep the DVD in your hard disk for later burning and not delete after the burn. With (2) you say to the program to burn the DVD after the build, use it if you want, but you can also burn the DVD with another program. Personally I prefer DVD X Maker to do all the job. (3) Let's you to simulate the burn (will not burn anything). Use it only if you have problems and you can't find the problem! Finally click (4) to start the burn. Wait about 45-90 mins and your DVD is ready! Well done! Remember to thank us! :-) |