Droppix Recorder is a new burning program. Through this small review / guide we invite you to have a look in its features as well as guide you through the simple steps of creating a DVD video disc. Droppix Recorder is a feature-full program. You can burn data CDs and DVDs, audio CDs using Mp3, WMV, OGG and Wave files, direct CD-to-CD and DVD-to-DVD copy, as well as create images of CDs and DVDs in your hard drive. Of course we are more interested in its video media burning options which are many. You can create VCD, SVCD, XVCD, XSVCD mini DVD and DVD discs. Surely there are very few programs offering all these formats. If all these were not enough for you, you can use Droppix Recorder's toolbox to erase rewrite able media, benchmark the speed of your devices and rip music from audio CDs to Mp3s or other formats.
All these offered in a very good looking GUI which is easy for the newbie, but allows the experienced user to set expert settings as well. Its price for what it offers is very low, so if you need a burning software there is no need for second thoughts.
It would be a good idea to have a look to the trial version which is full working for 30 days.
You can find it in our downloads section here or give it a direct download by clicking here.
If you have already tried the trial and want to purchase a serial number to activate Droppix Recorder you can click here.
Below, there is the guide about burning DVD video discs using Droppix Recorder.
![]()
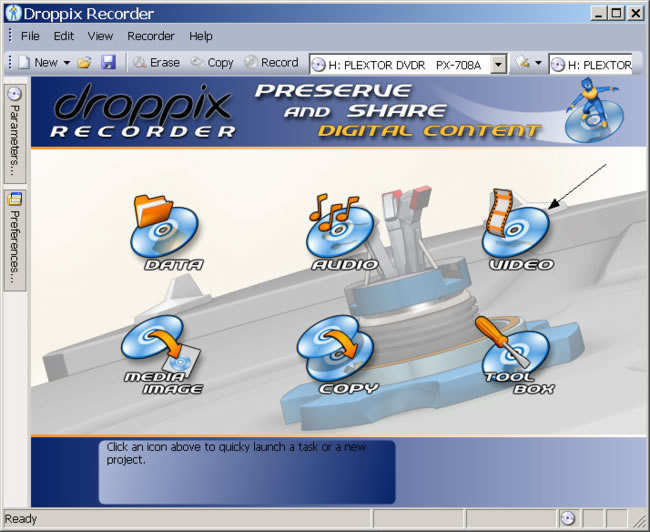 |
This is the main window of Droppix Recorder. From here you can use any feature you want, with just a few clicks. In our case we want to create a DVD video disc so we click the Video icon. |
![]()
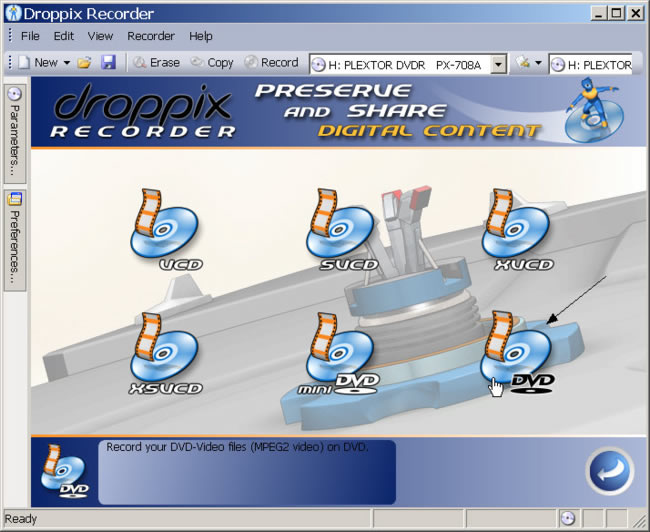 |
Here you can see all the video disc options we mentioned before. We click on the DVD icon. |
![]()
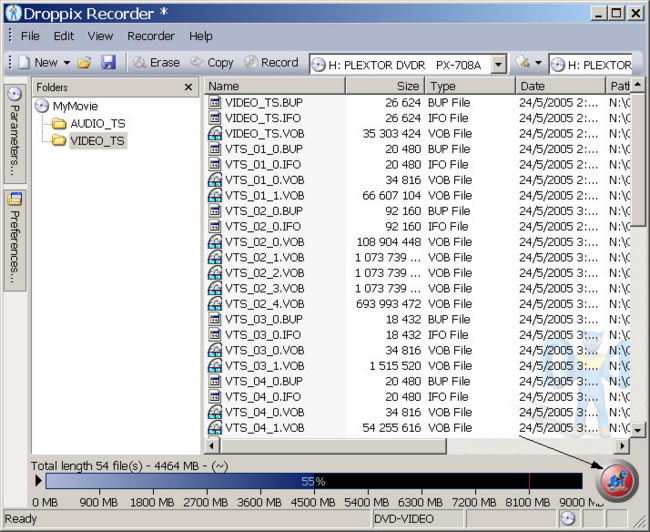 |
Next thing that will open is this window. The disc will contain two folders, VIDEO_TS and AUDIO_TS. Double-click on the VIDEO_TS folder and then drag-and-drop all the files from the directory you have the DVD you are about to burn in the Droppix Recorder window. All files should be in the VIDEO_TS folder. (the AUDIO_TS folder remains empty). You may want to change the disc label by right-clicking and selecting remain on the MyMovie title (just over the two folders). When you're done click the red icon in the down right corner to proceed. |
![]()
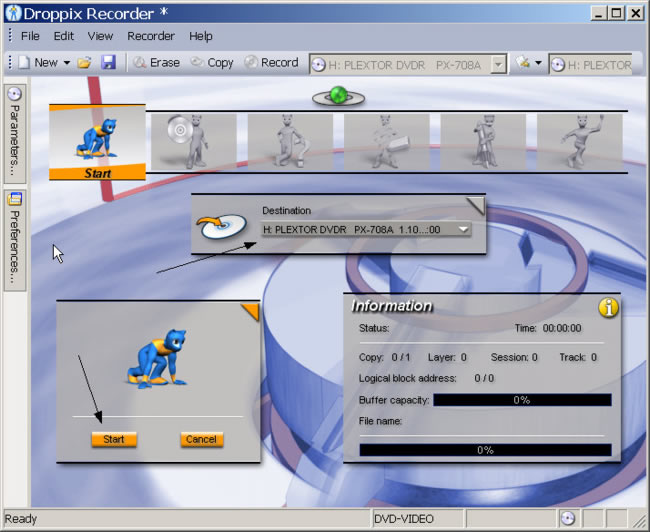 |
We are just one step from the end! Here you should select the destination drive (if you have more than one). Insert the blank media, and when you're ready click Start. |
![]()
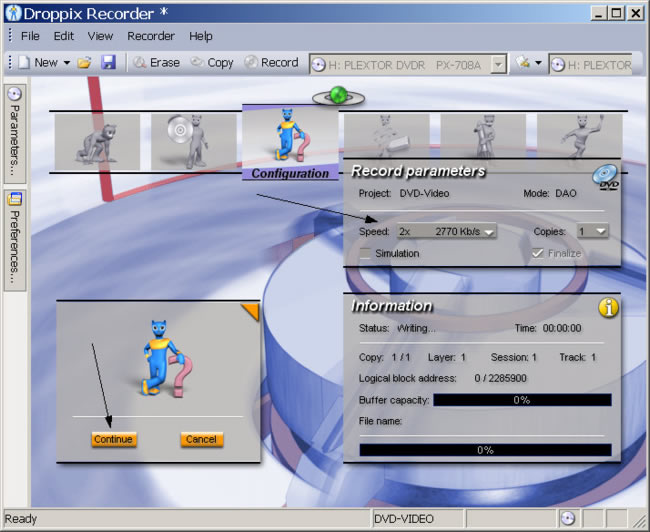 |
Here you must select the final options like the write speed and the number of copies you want to create. Finally click Continue. That's it! Depending on the write speed you select the disc will be ready in 8-30 minutes. Note that generally for DVD video discs it is recommended to use lower speed that your burner's best to ensure standalone compatibility. (2x or 4x should be OK). |
As you understand we were really impressed by Droppix Recorder. So much that it's now our program of choice for everyday use. I suggest you give it a try even if you already have a burning program. You can download the trial by clicking here. It will work for 30 days, and don't worry it doesn't contain any adware or spyware. If you have any questions you can use our forums!
Comments