A new program that I tried recently is FairUse Wizard. From the first time I used it I was impressed from the easy to use interface and the very good quality of the output file. And the best of all the program is free, you can download it from here with no cost!
Now about the program itself, I think it's easier to use than DVDx, but it cannot make a DivX / DivX file from the DVD. You don't have to worry though as it includes a ripper and it will unlock and copy the DVD in your hard disk. Actually FairUse is the only program you are going to use as it includes even the codes! In the first screen you can click Options and enable the included codecs or you can leave it in the default value and use the DivX / XviD codecs that you already have in your system. The program has a few bugs (I had troubles when working with the included XviD codecs) but it works OK. Note that you may also need an ASPI layer if you have not installed one yet! Now let's start the guide!
![]()
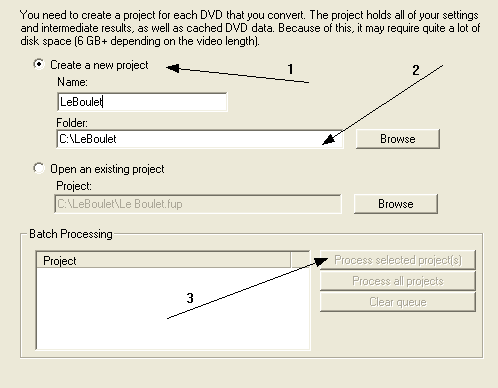 |
First of all you'll need to create a new project. Just set the name of the project (1) and the folder you want to put the files into (2) and then click Next. The Batch processing (3) is useful when you want to do more than 1 encodings one after another (for example if you let your PC work when you sleep). |
![]()
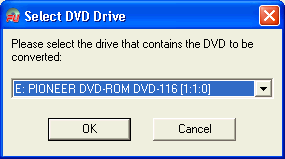 |
This screen should come up. Just select the drive you have the DVD into and click OK! |
![]()
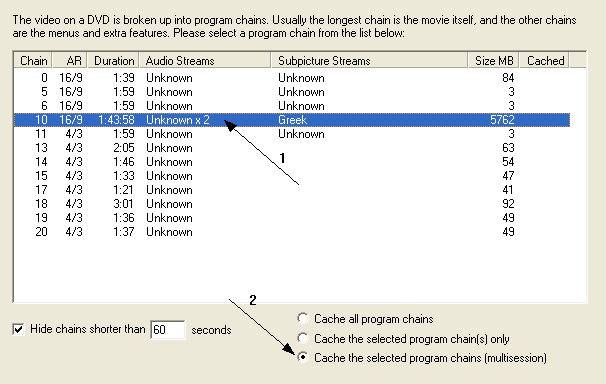 |
Now you have to select the main movie. You can easily find the main movie from it's length, so select the main movie (1) and the third option (2) and click Next. |
![]()
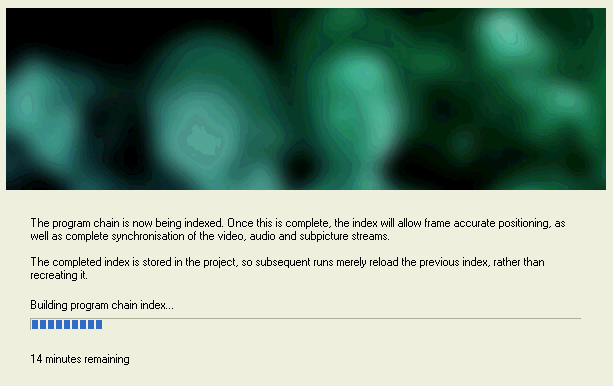 |
The program now actually rips the DVD in your hard drive, so you'll have to wait a little (about 20mins) before you can continue. After this process you can remove the disc from your DVD drive. Make sure that you have around 10GB free before you find out that the ripping failed because you ran out of space! |
![]()
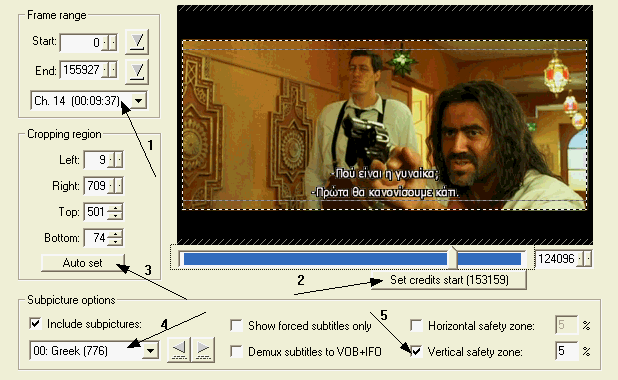 |
Here's the nice stuff! In the Frame range (1) you can see the frames that are going to be encoded. Move the slider above the Set credits start (2) button to the point that the credits start and click the button. Put the value you'll see in the button itself in the End frame textbox of the frame. rage option (1). |
After that you'll need to chop the black bars. Auto set (3) works nicely, so just click it and it will do the job. Check out the preview window to be sure that everything was done successfully. If you want to add some subpictures (subtitles) then just check the box and select the ones you want (4). You can also edit or deactivate the vertical safety zone (5) which actually rises the subtitles a little bit. As always you can see the changes in the preview window. You may also want to select Show forced subtitles only to display the subtitles that a movie may have if for example in one scene they do not speak English. After all these, click Next. |
![]()
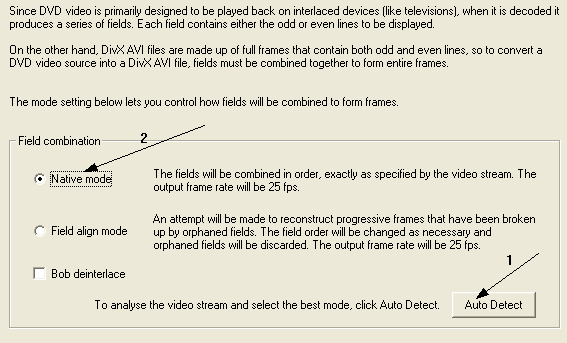 |
In this screen I suggest you click Auto detect (1) and then select the option it suggest you (2). Then click Next. |
![]()
 |
This is the last screen with settings so be patience! The settings are pretty easy as the program makes all bitrate calculations and stuff automatically. |
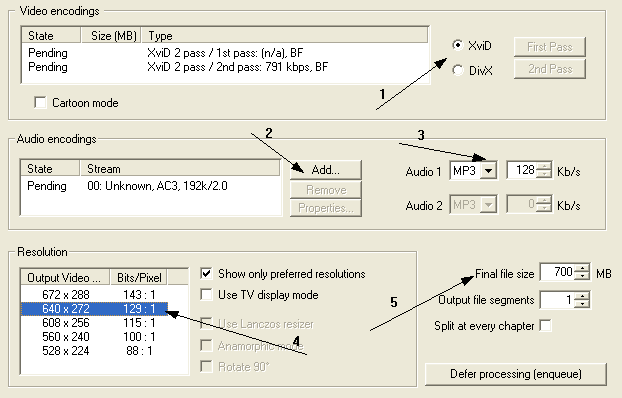
First of all select the codec you want to use (1). The results are almost the same, and the choice is yours, I preffer XviD. If your movie is a cartoon you may want to enable the Cartoon mode of XviD codec. Then add an audio track (2) and select the encoding (3). I selected AC3 2.0 (preffer it from AC3 5.1 if both exists and you are using Mp3 audio). For Mp3 128kbps is just fine, and you may go a little lower (like 96kbps) for a big movie. After the sound settings you need to select a resolution (4). I suggest you use the one that has a width closer to 640. Finally select size of the file (5). If you want it to be on a CD use something like 698MB to be sure. If you want to encode more videos you have to click the Defer processing button. After all these settings click Next and the encoding starts! |
![]()
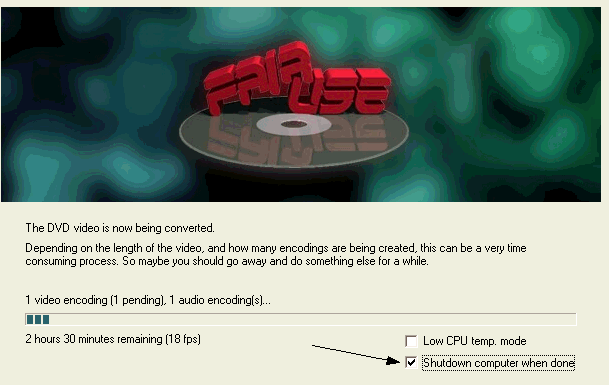 |
This is the encoding window. You may want to select Shutdown computer when done if you leave your PC and go. Low CPU temp. mode is not something you should enable except if you have an overclocked CPU and you are afraid about it. Just wait a few hours (note that the time you see is for the first pass only) and your DivX / XviD video will be ready! |
Finally I can say that I was impressed by FairUse Wizard. It is a very poweful tool that creates very good quality video of while it is easy for the newbie to use. In a comparison to the other freeware program that we have in our site, DVDx, I can say that FairUse is much better, and actually it's the program I use from now on. A very good thing is that it is updated often, while DVDx's development seems to have stopped. Also FairUse is much easier to use, includes a ripper and a calculator so that you don't have to bother. It still needs 1-2 things like the ability to encode directly from the DVD or to load DVD files from the hard disk and it is going to be perfect. Are you still here?


Comments
Anyone know what I might be doing wrong?
Also pl suggest me a good DVD ripper. DVD ripper I'm using is not good. Whole DVD I can't convert in to whatever file size (E.g 700 MB size)I want. Also some convertions can't be done in to one single file.
Pl help me.Thank you in Advance.
i'm using now FUW,
it's , Simple, easy to use, and if i may say real fast.
So thanx FUW making my life easy
Flap