Back when I was a child, I used to enjoy organizing the family photos into an album right after some vacation time and writing comments below. However, the times have changed and instead of the old photo cameras with the film, almost everyone now uses digital cameras that store everything in a flash memory allowing you not only to preview the photos after you take them but store a lot more. That convenience and the increased number of the photos makes someone wonder whether to print the photos (and pay the extra cost) or not. In the end most people keep their photos in digital form (or just print the good ones) and save them by using CDs or DVDs.
This is where PhotoDVD is extremely useful. What it does, is take your photos and instead of saving them in a data DVD which you need a computer to view it creates a video DVD, playable in all standalone DVD players. So you can just play the DVD in your living room and enjoy your photos on the TV with PhotoDVD's slideshow DVD with nice effects, comments and background music! It also includes a DVD burner so you can do everything very easily using a single simple program.
You can download PhotoDVD by clicking here.
![]()
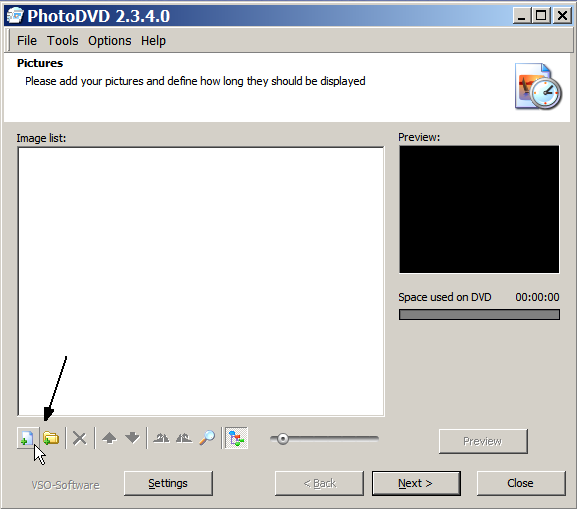 |
This is the main window of PhotDVD2. First of all you need to add the pictures you want to add in your slideshow. Click the first button the arrow shows to import individual files and the second one if you want to add the pictures contained in a directory. |
![]()
 |
|
![]()
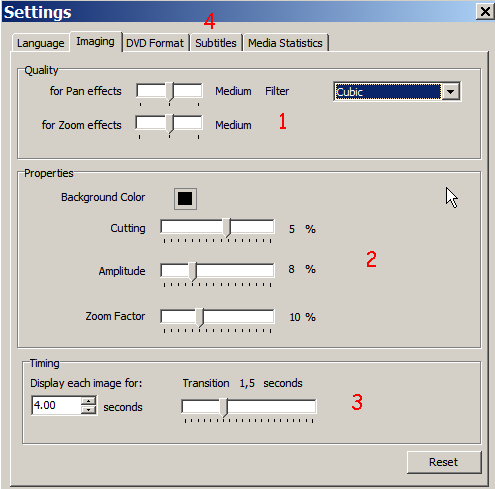 |
This is the Settings window. We will skip the Language tab, so go to the Imaging one. Here you can select the quality of the transition effects (1) and the filter. Medium should be fine, you can also set it to high if you want (takes more time). For the filter I suggest using Cubic. Next you can select some properties (2) like the background color of the slideshow, if you want to cut some of the border around the image (usually set this to 0%) and more. Default settings should be OK here. Finally in Timing (3) you can select for how long you want to display each image and how long the transition effect between two pictures will last. We will also skip the DVD Format tab as you can set these settings in the main windows easier so click the Subtitles tab (4) and go to the next step. |
![]()
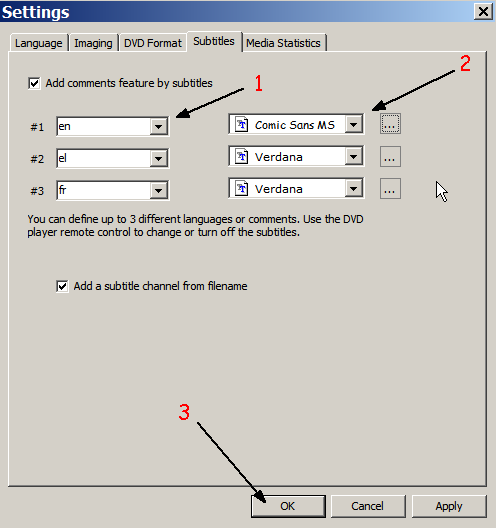 |
ConvertXToDVD has a very smart system of importing comments, it uses subtitles tracks to display them. That way you can add multiple different comments (for example more formal comments to show in your family in one track and more "spicy" ones to watch when you are with your friends) and switch between them with your DVD players remote control or you can disable them and watch just the slideshow. In this options screen you can set the language (1) of each track (which is what language the DVD player will display that those subtitles are as well as the font and the size of the letters (2). When you are done, click OK (3) as we are done with the settings window. |
![]()
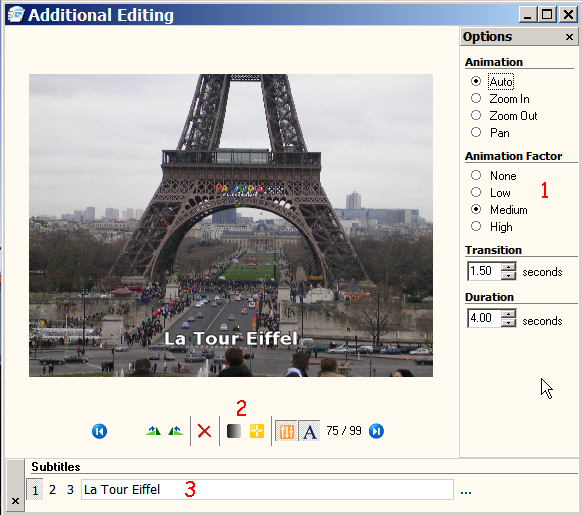 |
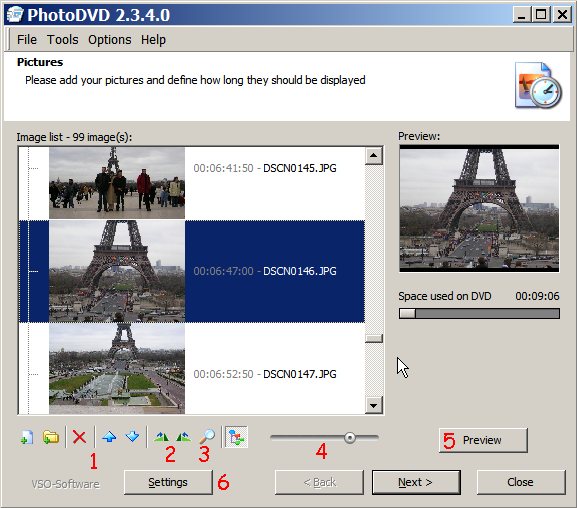
The transition and duration time shown here apply only to the image you are editing when you set them. If you want to change the duration time for all images use the options as we described in Step 3. |
![]()
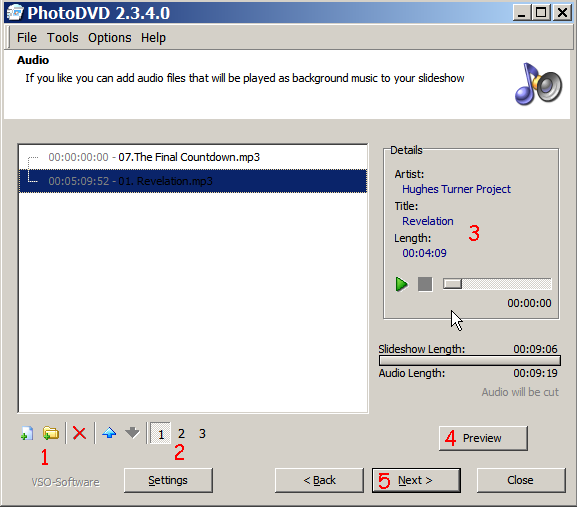 |
When you are done with the pictures, the next step would be to add audio tracks in your slideshow. You can add a file or a folder of audio files (1). There are three different audio tracks (2) you can select so that you can have one track with music and another one with your own recorded commentary for example. You can also playback the song to be sure it is the right one (3) and of course once again preview the whole slideshow, including the music this time (4). When you are done selecting your music click Next (5). |
![]()
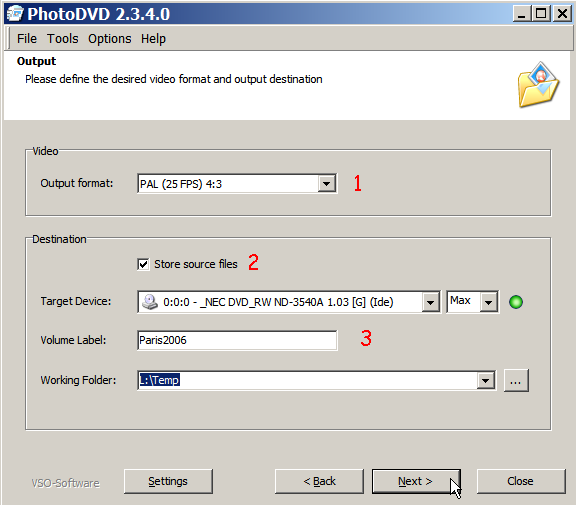 |
Now you need to set the output settings. First of all select the output format (1), depending on the format your TV and DVD player supports. Next, select Store source files (2), the device you'll use to burn the DVD as well as the DVD's label (3). Also make sure you set a working folder for the files that need to be created in a hard disk that has more than 4GB of free space. When you're done click Next. |
![]()
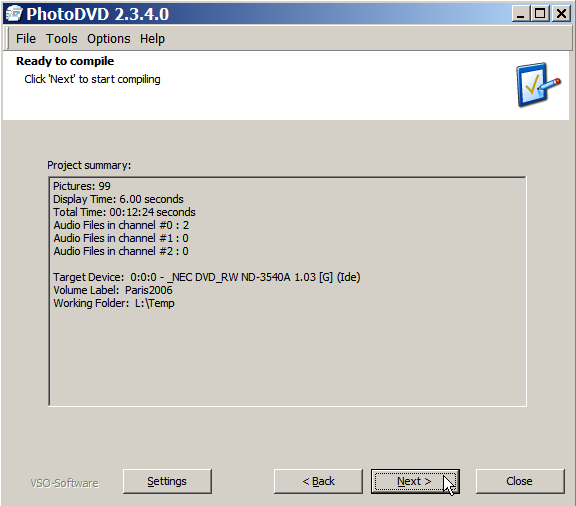 |
This is a final summary screen before you encode and burn. Just click Next... |
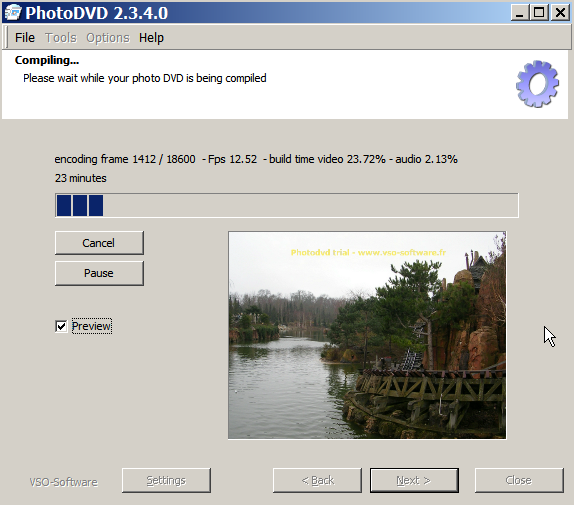 |
... and the encoding starts! Just wait until PhotoDVD compiles the slideshow DVD and you are good to go! |
You can download PhotoDVD by clicking here. You can buy PhotoDVD here or have a look at VSO's and DVD-Guides.com special offer to get both ConvertXToDVD and PhotoDVD for a discounted price here.
Comments
Thanks,
don
Thank you.