You can download StaxRip from the link below. You will also need ffdshow so if you don't have it get it as well. Before you start you should also rip the DVD to your hard drive. Follow this guide using DVDFab HD Decrypter to do that. I suggest that you only rip the main movie in order to make the conversion using StaxRip a bit less complex.
Step 1
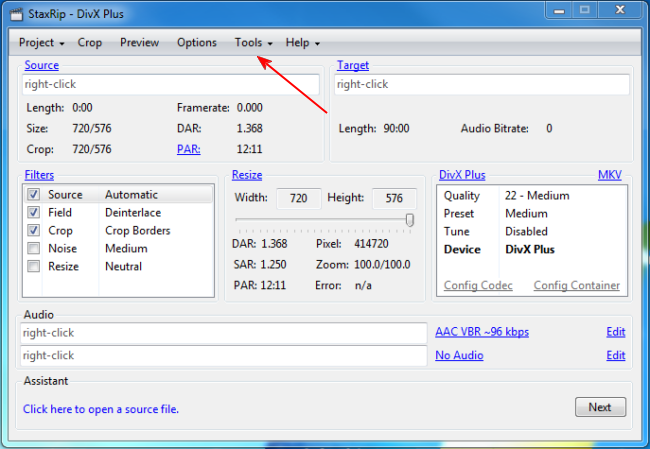 |
This is the main StaxRip window. To start we will make sure we have all required programs installed. Go at Tools -> Applications. |
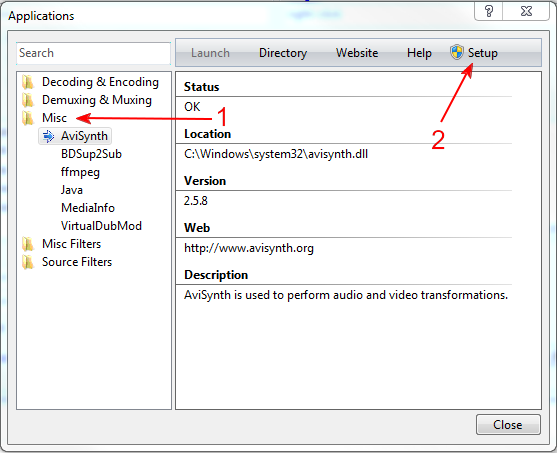 |
Open the Misc (1) folder. First of all select AviSynth and click Setup (2). Proceed with install. If you don't have Java (or are not sure), select it as well and click the Website button in order to download and install it. You should already have ffmpeg. This is all we need right now so close the applications window. |
Step 2
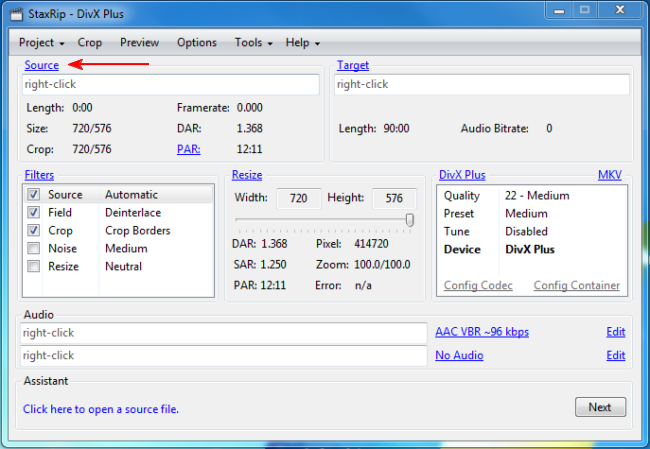 |
Note that in various areas of the GUI the titles are like hyperlinks. We will click on them in order to set various settings. To begin, lets click Source in order to load the DVD files. |
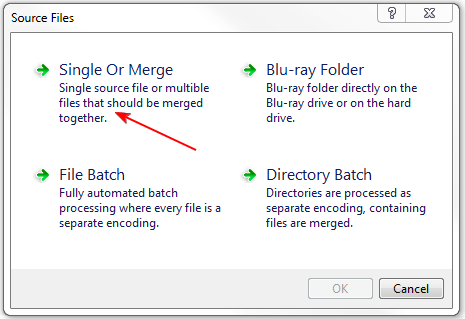 |
At the window that pops select Single Or Merge and select ALL the .vob files that you previously ripped. Click OK. |
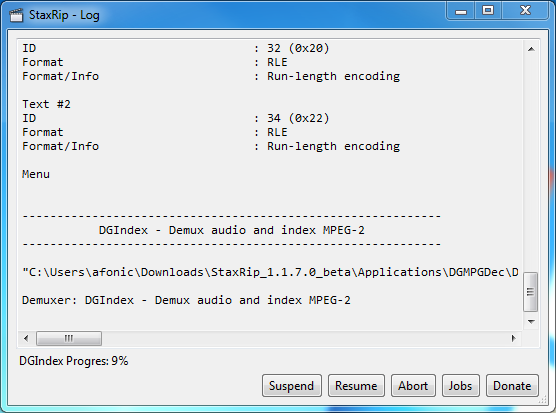 |
StaxRip will now demux, index and merge the .vob files so be a bit patient. When it is done, move to the next step. |
Step 3
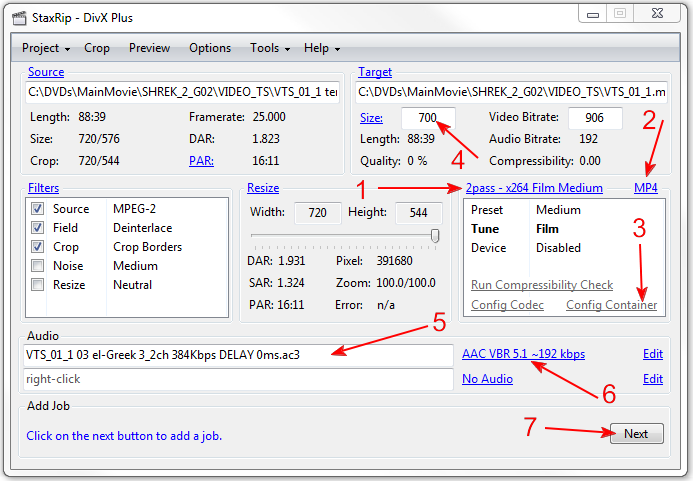 |
First of all, don't panic by the image above! We will explain everything as simply as possible in a few paragraphs! (1) This is main preset selection. You just need to remember this: For a fixed size file (for example you need your file to be 700MB) select 2pass. For fixed quality and size depending on the movie length and content select the rest of the settings. The Devices presets is just what it says, ensures your file is compatible with the device named. For this example I selected 2pass x264 Film Medium. (2) This is the container that we will use. MKV and MP4 are obvious and well tested choices, here I selected MP4 to maximize compatibility. (3) Clicking Config Container will allow you to add subtitle tracks. If you are interested in adding some, check the image just below for more instructions. (4) Here you can set the target size in megabytes. Note that this text area will not appear if you don't select 2pass and the output size will the determined by your source as I explained above, as well as the quality setting you have chosen. (normal or HQ) (5) This is the audio track you are using. Double click on it to select another one or add a second one in the white space below. Note that this will open the temp folder that StaxRip has already demuxed your DVD files in. (6) This is the audio codec, channels and bitrate. I have selected the AAC codec here and a 5.1 configuration in order to preserve the multichannel audio. You can also select Mp3 or the Just Mux option that will retain the original DVD audio unchanged. |
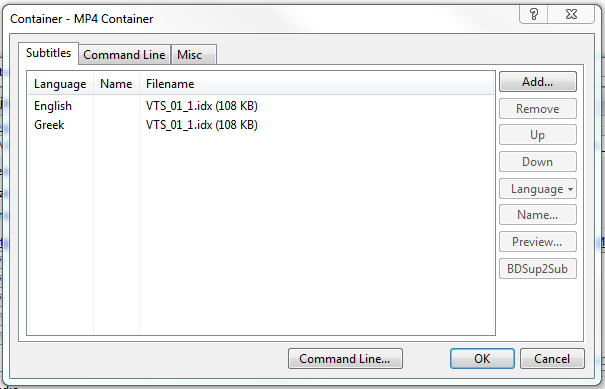 |
This is the window that allows you to add subtitle tracks. Easily just click Add and the folder where your DVD files have been demuxed will open. Add the tracks you want and click OK. This is it! Now click Next (7) to proceed with the encoding. |
Step 4
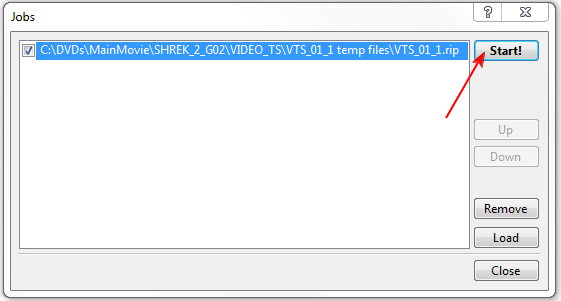 |
After clicking Next the Jobs window will appear. Click Start in order to start the encoding process. If you want to encode more DVDs at once just click Close and repeat the steps again to add a second job. |
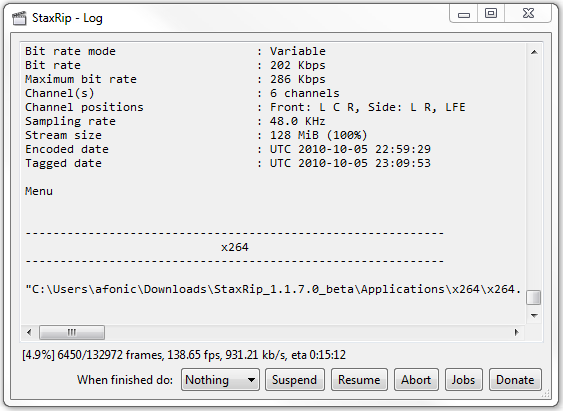 |
You can view the process in the Log. In a few minutes/hours your file will be ready! Please note that even though StaxRip allows complex codec settings to be set (by clicking Config Codec) as well as manual Crop and filter options I don't feel they should be explained in this simple guide nor that they are necessary for a nice result. Following these steps will create a nice DVD rip for you to backup and enjoy! As usual, please do not use the comments form below for questions or problems you may have - use the forums instead. Instead leaving as a comment about the guide itself is welcomed and encouraged! |
Comments
Hi,
try to remove it from the list of decoders at Tools -> Settings -> Demuxing.
Operation failed!
StaxRip has crashed!
Operation failed!
The process cannot access the file 'G:\!-Directory -!\Ripped_DVD\[ not_protected_m ovie_here]\Audi o_AC3_2-ch_Engl ish\VIDEO_TS\VT S_01_1 temp files\VTS_01_1. d2v' because it is being used by another process.
but um, nothing is touching this damn file...
then i get a ton of nonsense of other nonsense that doesnt help...
im on win7 64bit... does anyone know if this is a reason for this annoying error?
Thanks,
Hi,
yes of course it is important, it allows you to select a quality vs size setting. I use around 3000kbps for HD video.
1 question,
Is videobit rate important?
What is the best video rate for HD?
Hi,
I feel that this is out of the purpose of this article. There are more pages in this site and elsewhere that explains the pros and cons of various codecs.